The Best Fluffy Pancakes recipe you will fall in love with. Full of tips and tricks to help you make the best pancakes.
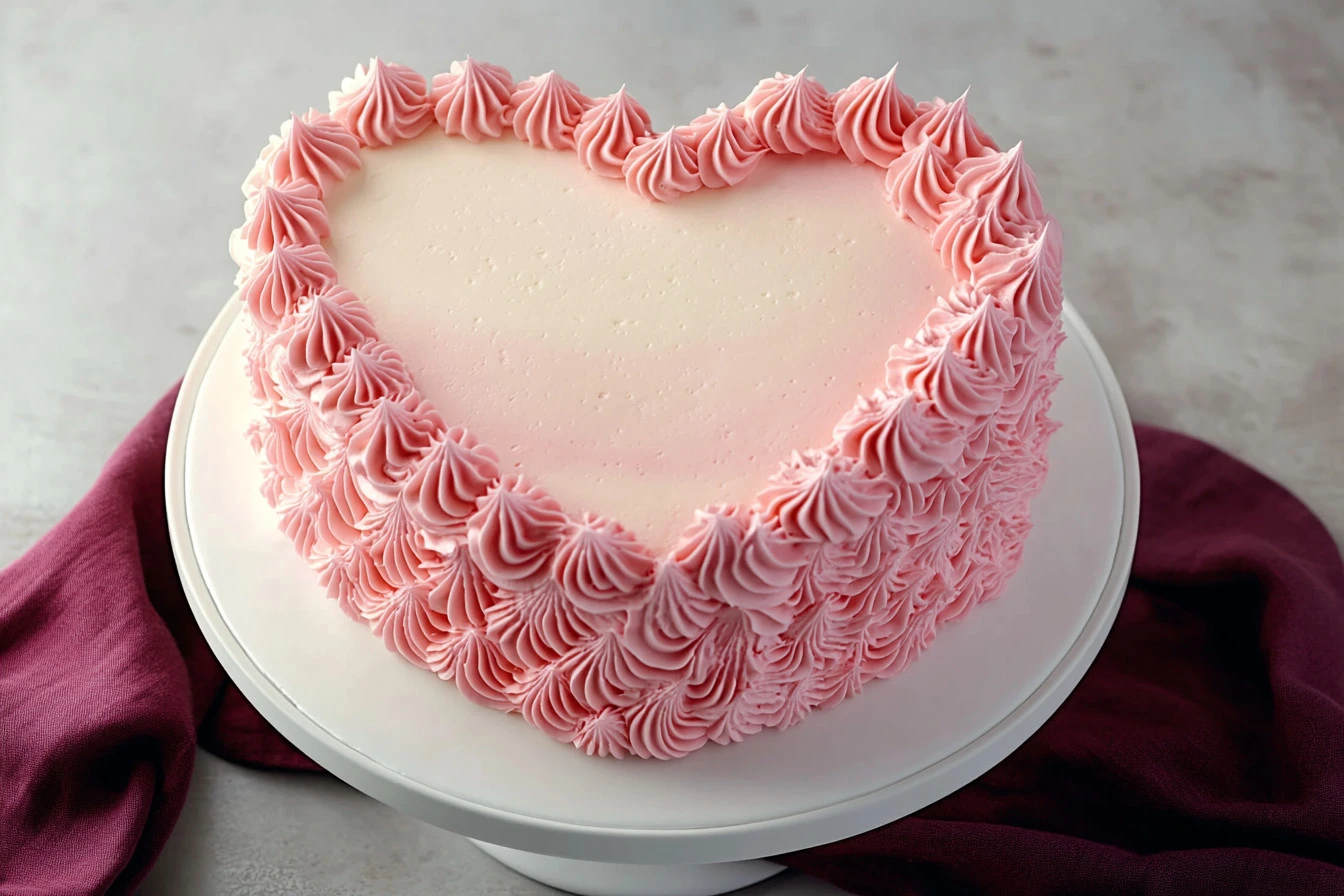
Vintage Heart Cake
Introduction
The Vintage Heart Cake is a charming dessert that brings warmth and love to any celebration. Ideal for birthdays, anniversaries, or simply to show someone you care, this beautifully decorated cake has a nostalgic feel that will delight everyone. With its lovely heart shape and colorful frosting, it’s a feast for both the eyes and the taste buds.
Why Make This Recipe
Making a Vintage Heart Cake is not just about the delicious taste, but also about the joy of creating something special. It’s great for those who wish to impress loved ones with a homemade treat. Plus, the vintage piping technique adds a touch of elegance, making it perfect for special occasions. Whether you’re a beginner or an experienced baker, this recipe is simple to follow and offers a satisfying baking experience.
How to Make Vintage Heart Cake
Ingredients:
- 2 8-inch round cake layers, cooled and leveled
- 3 batches of buttercream (about 9 cups of vanilla buttercream)
- Food color gels (AmeriColor Deep Pink and Fuchsia)
- 10×10 inch piece of cardboard and/or a 12-inch cake drum
- Piping bags
- Serrated knife
- Cake turntable
- Icing smoother
- Angled spatula
- Wilton Tips (4B, 32, and 102 for vintage piping, and Tip 3 for writing)
Directions:
Step 1: Create the Heart-Shaped Cake Layers
Cut the first cake layer with a serrated knife to shape it into a heart. Use the first layer as a template for the second layer.
Step 2: Assemble & Crumb Coat the Cake
Place the cardboard base on the turntable. Add a layer of buttercream, then place the first cake layer on top. Use additional buttercream to adhere the two curved pieces on top. Crumb coat the cake and refrigerate for at least 30 minutes.
Step 3: Frost the Cake
Frost the top and sides with buttercream. Smooth it out using an angled spatula and icing smoother. Refrigerate for at least 20 minutes.
Step 4: Color the Buttercream
Divide the remaining buttercream into three bowls and tint them using food color gels. Prepare piping bags with different tips.
Step 5: Create the Vintage Piping
Pipe borders and garlands on the cake using the prepared buttercreams.
Step 6: Write a Message
Use the remaining buttercream to write a message on the cake with Tip 3, practicing off the cake first.
How to Serve Vintage Heart Cake
Serve the Vintage Heart Cake at room temperature. Slice it into wedges and enjoy. You can pair it with a scoop of vanilla ice cream or fresh fruit for an extra treat.
How to Store Vintage Heart Cake
Store any leftovers in an airtight container. The cake can be kept in the refrigerator for about 3 to 5 days. If you want to preserve it longer, you can freeze individual slices. Just wrap them well in plastic wrap and foil before placing them in a freezer-safe bag.
Tips to Make Vintage Heart Cake
- Make sure your cake layers are completely cool before frosting to prevent the buttercream from melting.
- Use a good quality butter for the buttercream to enhance the flavor.
- If you’re new to piping, practice on parchment paper before piping directly onto the cake.
Variation
You can customize the colors and decorations based on your theme. Use different food coloring for various occasions or add edible glitter for a more festive look.
FAQs
1. Can I use a boxed cake mix for this recipe?
Yes, you can use a boxed cake mix if you want to save time. Just follow the package instructions to bake the cake.
2. What if I don’t have a cake turntable?
No problem! You can place the cake on a flat surface or a rotating plate to frost it. Just be cautious when smoothing out the icing.
3. Is it difficult to do the vintage piping?
It may take some practice, but vintage piping is manageable with patience. You can start with simple designs before moving on to more complex styles.