The Best Fluffy Pancakes recipe you will fall in love with. Full of tips and tricks to help you make the best pancakes.
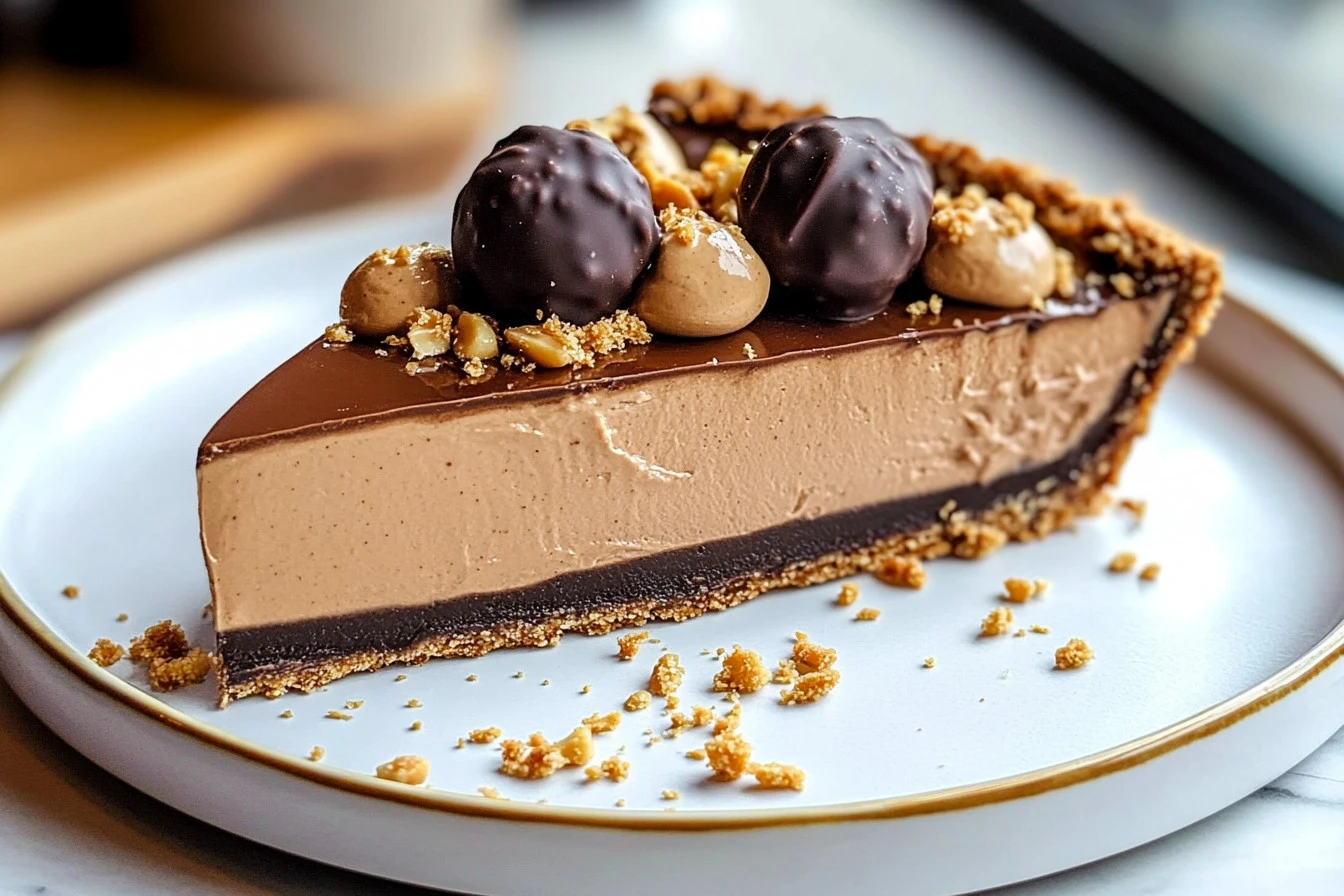
Peanut Butter Cream Pie
Peanut Butter Cream Pie is a delightful dessert that brings together the rich and creamy flavors of peanut butter and cream. With a crunchy crust and a smooth filling, this pie is perfect for any occasion. Whether you’re celebrating a birthday, enjoying a family gathering, or just craving something sweet, this pie will surely hit the spot!
Why Make This Recipe
There are many reasons to make Peanut Butter Cream Pie. First, it’s incredibly easy to prepare, making it a great choice for both beginner and experienced bakers. Second, its luscious flavor appeals to peanut butter lovers everywhere. Finally, with its no-bake element after making the crust, it’s a refreshing dessert that can be served chilled, making it perfect for warm days.
How to Make Peanut Butter Cream Pie
Making a Peanut Butter Cream Pie involves a few simple steps. You start with the crust, then mix the creamy filling, and finally chill it until set. Below are the ingredients and directions you’ll need to create this tasty treat.
Ingredients
- 1 1/2 cups graham cracker crumbs or Oreo cookie crumbs
- 1/2 cup unsalted butter, melted
- 1 cup creamy peanut butter
- 1 cup cream cheese, softened
- 1 cup powdered sugar
- 1 teaspoon vanilla extract
- 2 cups whipped cream for topping
- 1/4 cup chocolate syrup, optional for drizzling
- 1/4 cup crushed peanuts, optional for garnish
Directions
- Preheat your oven to 350°F (175°C).
- Combine the graham cracker crumbs and melted butter.
- Press this mixture into the bottom of a pie pan and bake for 8-10 minutes until golden. Let it cool completely.
- Beat the softened cream cheese until smooth.
- Add the peanut butter, powdered sugar, and vanilla extract, and mix until fluffy (about 2-3 minutes).
- Gently fold in the whipped cream, keeping the mixture light and airy.
- Once the crust is cooled, fill it with the peanut butter mixture.
- Smooth the top with a spatula and refrigerate for at least 4 hours, preferably overnight.
- Once set, top with whipped cream, chocolate syrup, and crushed peanuts if desired.
- Slice and serve.
How to Serve Peanut Butter Cream Pie
Serve slices of Peanut Butter Cream Pie chilled. You can add an extra dollop of whipped cream on top for a beautiful presentation. Drizzle some chocolate syrup over the slices for added sweetness and crunch by sprinkling crushed peanuts if desired.
How to Store Peanut Butter Cream Pie
To store leftover Peanut Butter Cream Pie, keep it covered in the refrigerator. It will stay fresh for up to 3-4 days. If you need to keep it longer, you can freeze it, but be sure to wrap it tightly with plastic wrap or aluminum foil to prevent freezer burn.
Tips to Make Peanut Butter Cream Pie
- Make sure your cream cheese is softened before mixing. This helps the filling become smooth and creamy.
- For an extra touch, try using flavored whipped cream or adding chocolate chips to the peanut butter mixture.
- If you like a thicker pie, you can double the filling ingredients.
Variation
You can change this recipe by using almond butter or cashew butter instead of peanut butter for a different flavor. You can also add ingredients like crushed Oreos or a layer of chocolate ganache for added texture and taste.
FAQs
Q: Can I use natural peanut butter?
A: Yes, you can use natural peanut butter, but it may change the texture slightly, making it less creamy.
Q: Can I make this pie ahead of time?
A: Yes! This pie can be made a day or two in advance. Just keep it refrigerated until you’re ready to serve.
Q: Is there a gluten-free version of this pie?
A: Yes! Use gluten-free cookie crumbs for the crust instead of graham crackers or regular Oreos.
Now you’re ready to enjoy a delicious Peanut Butter Cream Pie! Grab your ingredients and start baking this fabulous dessert that everyone will love.